WooInventory User Guide
You can deploy WooInventory Plugin in two ways, either from WordPress Backend or using FTP.
Installing WooInventory Plugin from WordPress Backend
- Download plug-in file from Order mail you have received.
- Login into WordPress backend.
- Click on “Add New” under “Plugins” section from left Navigation menu. Click on “Upload Plugin” button on this page
-
Click on Browse button and select downloaded zip file. You will see selected file name on screen.

- Click on “Install Now” button, after few seconds the plugin will get Installed
Plugin ActivationOnce plugin is installed next step is to Activate the plugin
- Click on Activate link.
- You will see “WooInventory” tab on left menu. Click on Activate link.
-
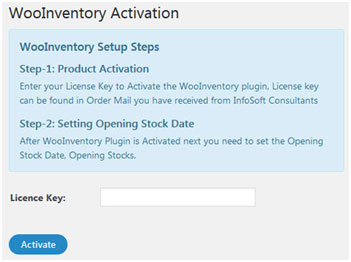
Activate purchased plug-in by entering License key, this can be found in your Order email you have received and click “Activate” button
-
Upon successful Activation of plug-in you will see all pages of WooInventory plug-in on left hand side WP navigation menu.
Opening Stock Setting
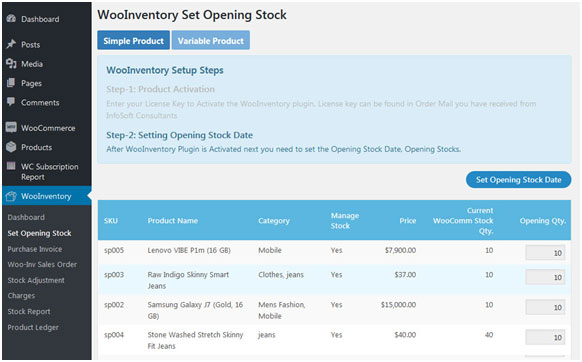
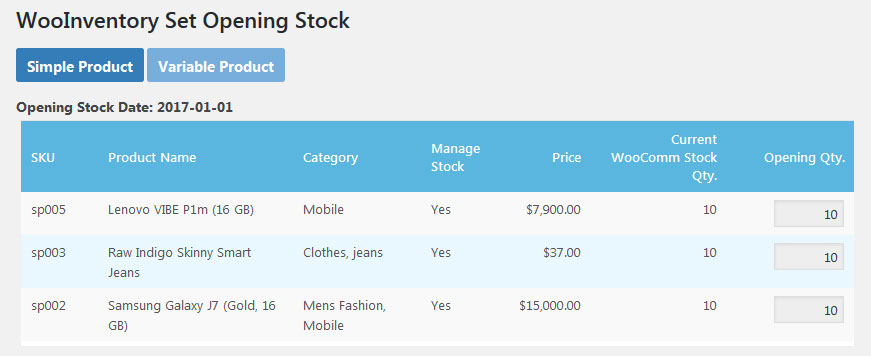
- After activation next step is to set the Opening Stock Date and Opening Stock Qty for all Products. Upon Activation this will automatically take you to a page for setting Opening stock
Important: WooInventory will pickup all product Opening stock from WooCommrece Products page “Stock Quantity” hence its very Important that you verify all products simple as well variable stock quantity and do any necessary updates in stock qty if required.
-
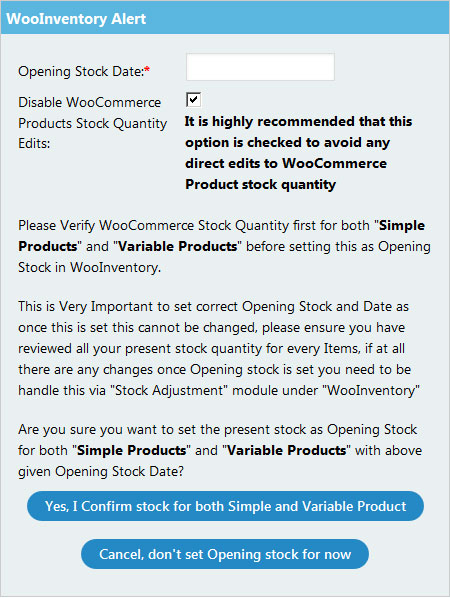
When you are ready to set the Opening Stock click on “Set Opening Stock Date“,and you will see one popup, from there select stock opening date and click on “Yes, I Confirm stock for both Simple and Variable Product” Button.
-
Once Opening Stock is set you will see the WooInventory Set Opening Stock page with selected date and opening stocks
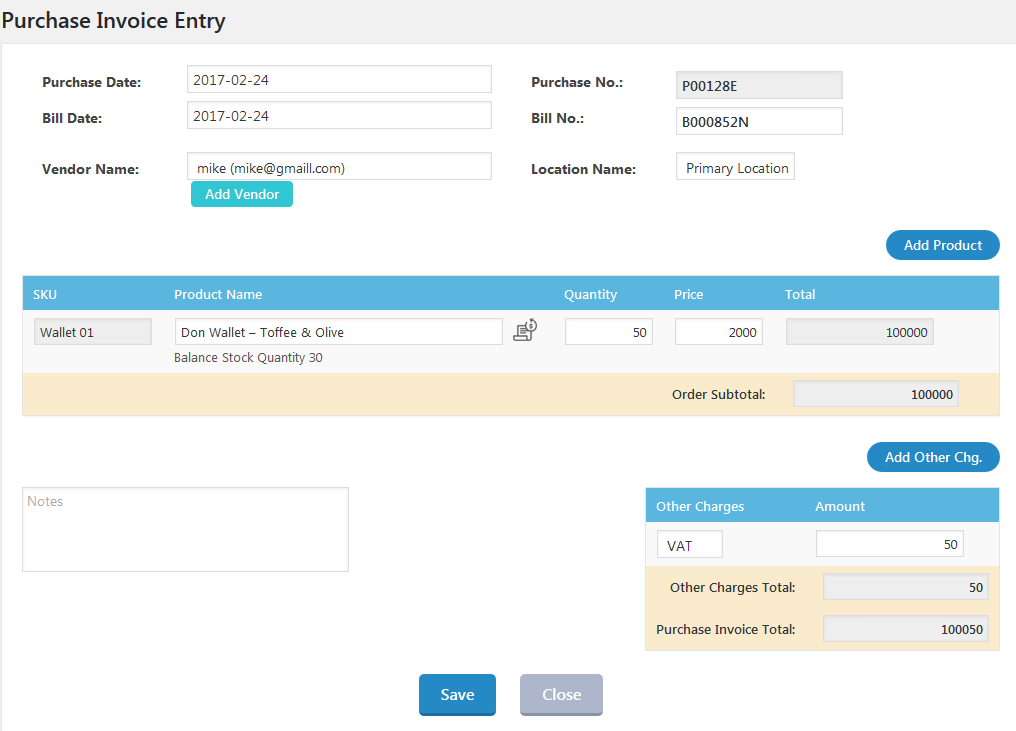
Purchase Invoice EntryAny New stock addition needs to be done via Purchase Entry.
- Click on Purchase Invoice link on left side menu in WooInventory
- Click on “Add Purchase” Button.
- Select Purchase Date, Bill Date, Vendor, Location.
- Enter the product name, enter quantity of purchase, price and other charges.
-
Then click on “Save”.
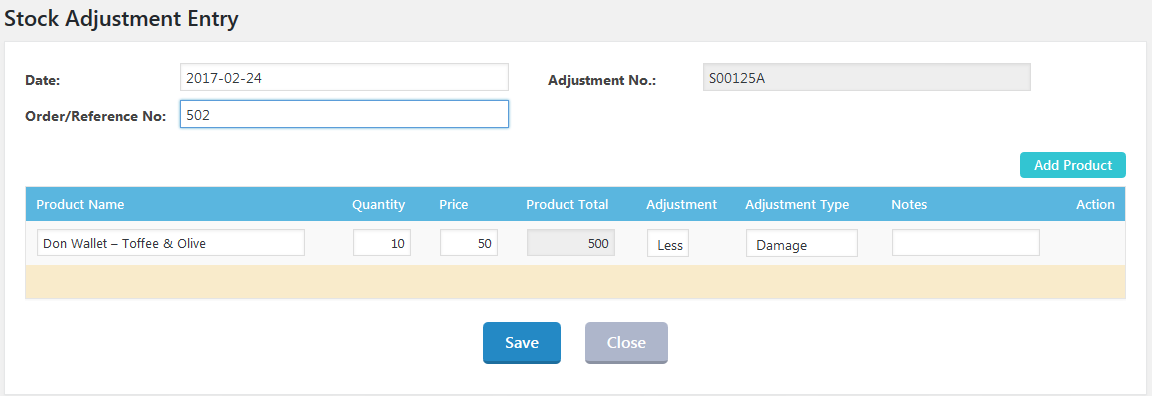
Stock AdjustmentFollowing are the scenarios when you will be required to make Stock Adjustment Entry –
- Change in Sales Order Item Quantity, example ITEM-A Original Sales Qty is 10 which is changed to 5
- Change in Item Name, example ITEM-A Qty is 10 is changed to ITEM-B Qty 10
- Deletion of any Item from Sales Order
- Or Any other scenario affecting stock like damaged goods which now no longer needs to be shown in stock.
No need to pass any Stock Adjustment Entry for Refunds as this is automatically taken care and respective Stock Adjustment Entry is getting generated.
- Click on Stock Adjustment link on left side menu in WooInventory
- Click On “Add Stock Adj.” Button
- Enter the product name, Quantity, Price
- Select the Adjustment (Add/ Less), Reason of Adjustment Types With respective of Date and Order/Reference No.
-
Then Click On “Save”.
WooInvetory Sales OrderThe WooInventory Sales Order module is a copy of WooCommerce sale orders, WooInventory uses this Order details for its reporting calculation.
Vendor Entry
- Click on “Add Vendor” from purchase Invoice entry module
-
Fill required fields and click on “Create New Vendor”.
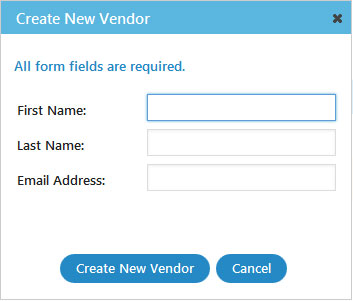
Edit Vendor
- Click on “Users” from left hand side WP menu.
- There will be one vendor section, Select a “Vendor” from it.
- Edit the vendor information and the click on “Update User”
WooInventory Module Voucher
-
From this module user will able to change the “Prefix” and “Suffix” of Purchase Entry and Stock adjustment Entry.

Note: This Prefix and Suffix will reflect into Purchase Invoice Entry and Stock Adjustment.


